Android Wear Suggest
The Suggest context stream is one of the core functions for Android Wear. It consists of a sequence of notifications about timely information, such as incoming messages or upcoming appointments. It can also display useful information about a task at hand, such as preparing a recipe or communicating with a digital assistant.
This section explains how to display your own custom notifications on a wearable device. The easiest way is to create a normal Notification, initialize it with your custom message, and send it using the NotificationManager. These notifications are displayed on both the handheld device and wearable emulator with a similar level of detail.
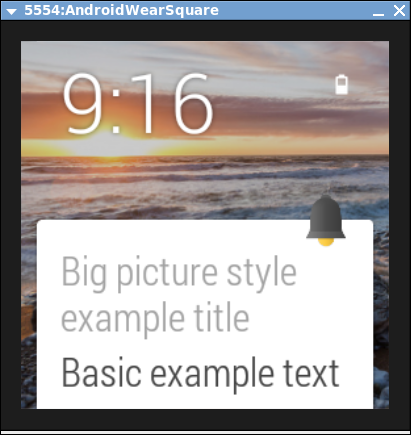
Normal text notifications are only the beginning however. Android 4.1 introduced three additional styles: Big Picture, Big Text, and Inbox. The big picture example demonstrates one way to add a contextual image to the notification.
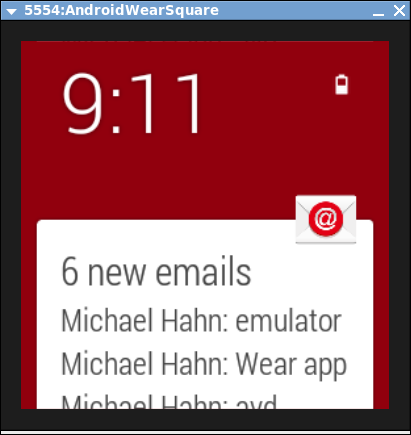
Android Wear adds even more styles that improve the user experience on the small screen of a wearable device. These styles make it possible to group or add pages to notifications. The email example shows how messages are grouped to reduce the number of notification delivered to a wearable.
You do not have to rely any of these stock UI styles. You can create your own full-screen layout that best suits your custom wearable application. Just keep it simple and be consistent in presentation and usage with other wearable displays. For example, do not try to replicate the grid layout of the handheld device - the wearable is just too small for this approach. Users just glance at their watch, speak simple commands, or tap and swipe the screen.
First Android Wear Suggest
This section explains how to create your first Android Wear notification and add it to the Suggest context stream on an Android wearable, or emulator. The new project wizard in Android Studio creates a project with two main activities, one for the handheld device and another for the wearable. To create your first suggest notification, add code in the handheld activity only, located in the “mobile” branch of the project hierarchy. The preinstalled software on a wearable device or emulator handles the task of receiving and displaying notifications from the handheld.
Create a Project
This section explains how to create a new project using Android Studio Version 1. If you have an earlier version, update it before starting this procedure.
- Launch Android Studio.
- Select Start a New Android Studio Project in the Welcome screen.
- In the new project dialog, enter your Application Name, Domain, and a project directory. ClickNext.
- In the form factors dialog, select Phone and Tablet and Wear. Keep the default SDKs, and then click Next.
- In the mobile activity dialog, select Blank Activity. Click Next.
- In the mobile option dialog enter an Activity Name for the handheld. Accept the defaults or the other fields and click Next. The name for an activity that generates a wearable “suggestion” might be SuggestActivity.
- In the wear activity dialog, select Blank Wear Activity. Then click Next.
- In the wear options dialog enter an Activity Name for the wearable. Accept the defaults for the other fields and click Finish. You can use the same name for the wearable activity that you used for the handheld activity.
Modify the Handheld Activity
- Import the the packages that support wearable features into the handheld Activity. As a minimum you need the following notification packages:
import android.support.v4.app.NotificationManagerCompat;
import android.support.v4.app.NotificationCompat;
import android.support.v4.app.RemoteInput;
import android.app.Notification;
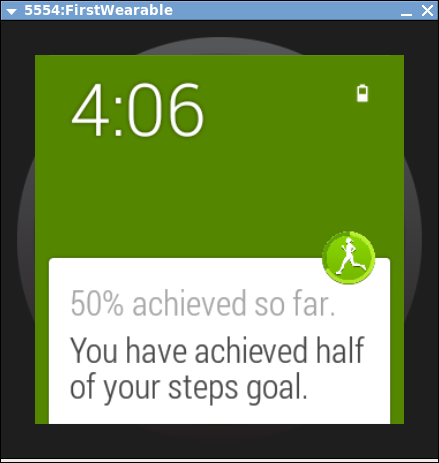
- Add Android Wearable features to a Wearable extender object, for example ShowBackgroundOnly, to the onCreate method.
NotificationCompat.WearableExtender wearableExtender =
  new NotificationCompat.WearableExtender()
      .setHintShowBackgroundOnly(true);
- Create a normal Android notification using the NotificationCompat.Builder and set desired properties, including those defined in the WearableExtender.
Notification notification =
  new NotificationCompat.Builder(this)
     .setSmallIcon(R.drawable.ic_launcher)
      .setContentTitle("Hello Android Wear")
      .setContentText("First Wearable notification.")
      .extend(wearableExtender)
      .build();
- Optionally, apply a release 4.1 style to the normal notification, such as the one used in the Big Picture example (NotificationCompat.BigPictureStyle).
- Get an instance of the Notification Manager service.
NotificationManagerCompat notificationManager =
    NotificationManagerCompat.from(this);
- Dispatch the notification.
int notificationId = 1;
notificationManager.notify(notificationId, notification);
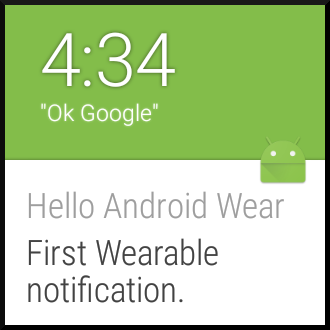
The result of this example is a notification with a title and body. If necessary, scroll through other notifications to view this one.
Example
The full Android Studio project for this example is posted athttps://github.com/LarkspurCA/WearableSuggest.
Comments
Post a Comment